
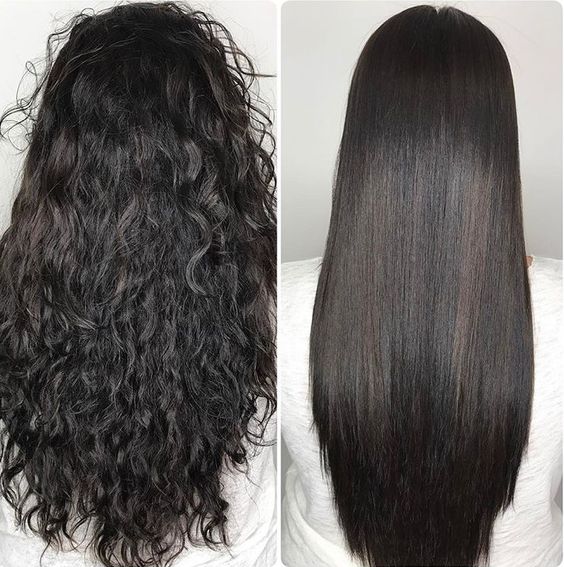
Diy Keratin Treatment At Home
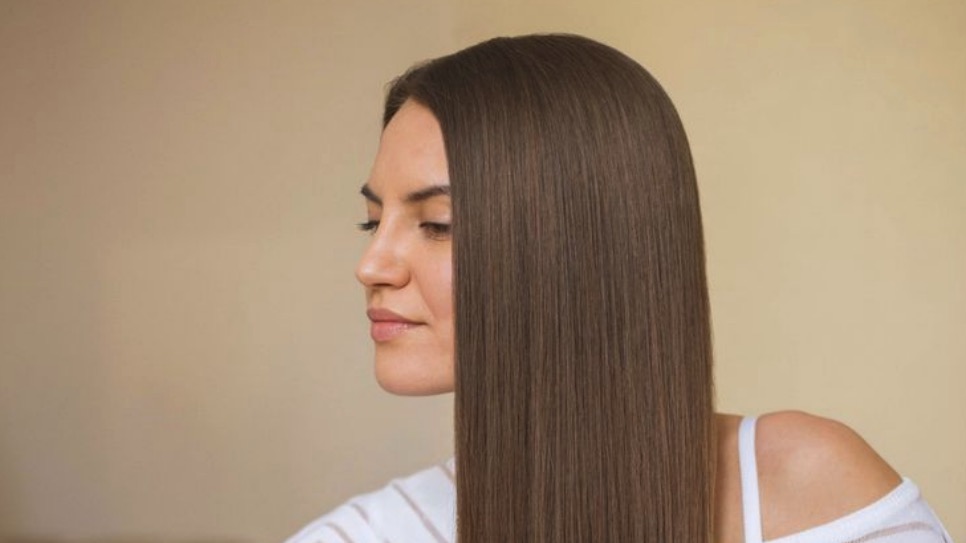
Oh, look at you, another innocent soul wanting fabulous frizz-free, silky hair that will make those shampoo-ad models turn green with envy? Let me introduce you to your hair’s guardian angel – “diy keratin treatment at home.” It’s like a protein shake for your sacchariferous tresses. It replenishes the silky sine wave-like keratin protein that often bids adieu to your hair due to exposure to odious chemicals or a thankless sun.
“But, oh, hair-guru!” You cry, “Getting this treatment done in a salon costs a kidney!” Worry not, my dear damsel in hair-distress. I bring you an inside scoop – “Do It Yourself Keratin Treatment.” So, you can become a wizard in your bathroom, brewing potions with natural ingredients for less than your morning coffee. Why burn a hole in your pocket when you can acquire sumptuous hair in your PJs under your roof? Let’s unravel the secrets of this miraculous DIY, shall we?

The Joys of Natural Ingredients
All hail the era of nature-inspired glamour and saying “sayonara” to the harsh, chemically-infused hair products. My dear friend, let the magnificence of nature kiss those tresses with an abundance of nutrition. Is Shampoo made in a factory? That was so yesterday! Now is the time to embrace the sheer magic of those greens, fruits and nuts, waiting patiently in your kitchen, ready to transform your mane into a glossy waterfall.
Have you ever glanced at the back of your store-bought hair care product and noticed the endless list of complicated chemicals? It’s like a science experiment on the brink of a catastrophe. Sodium Lauryl Sulphate… Paraben… err… no thanks!

Thin Hair? No problem! Skip the chemical cocktail and give your hair the natural pampering they deserve. Instead of harsh chemicals, imagine a game of Twister with Avocado, massaging its rich oils into your scalp, stimulating growth, and adding volume. Or, picture a majestic ball dance with Aloe Vera, its soothing gel gliding through your strands, leaving them soft, silky, and full of life.
Yes, natural ingredients can work wonders for Thin Hair. So ditch the chemical concoctions and embrace the beauty of nature!
Finding the perfect ingredients for your hair is like finding the perfect partner.
Don’t just go by the first impression or the packaging. You have to dig deeper and understand their true essence, pros and cons, before bringing them into your life, or in this case, your hair. Coconut or almond oil, the decision is tough! However, it all boils down to one integral question, “Are they right for you?”
So buckle up and prepare for this joyous journey of natural hair pampering. Trust me, your hair will thank you in its unique language by looking breathtakingly beautiful – so much so that even Rapunzel might get jealous. Just saying…
Step 1: Prepping Your Hair
Step 1: Prepping Your Hair
Picking the perfect shampoo is as crucial as your next date night outfit; after all, who wants frizzy hair to ruin those romantic vibes? Don’t grab whatever’s on sale; instead, opt for sulfate-free shampoos to treat your hair with love and respect.
Now, let’s wash those locks. Contrary to popular belief, water should be warm, not hot, while lathering up. (Turns out, a hot shower isn’t always good for your hair! Who knew?) Gently massage your scalp, don’t scratch it like you’re digging for gold, and work through the lengths. Overzealous scrubbing would only lead to tangles and tantrums.
Ah, the art of towel-drying! Most of us get it wrong with the towel-tornado head wrap, which, spoiler alert, is not doing your tresses any favors. Instead, gently squeeze out the water and pat your hair dry with a microfiber towel or an old T-shirt. This way, you’ll avoid breakage, frizz, and Medusa hairdo.
In conclusion, let’s recap (but not the shower cap, not just yet): pick the right shampoo, wash with TLC, and pat your hair dry like a pro. You’re ready to move on to your DIY Keratin Hair Smoothing Treatment journey. Trust us, your silky smooth hair will thank you later.
Step 2: DIY Keratin Treatment Recipes
Step 2: DIY Keratin Treatment Recipes
Oh, honey! It’s time for the moment you’ve been waiting for – the delicious, mind-blowing recipes that transform your hair into a silky-smooth dream! Don’t go eating this stuff, okay? It’s for your hair, not your taste buds. Keep calm and keratin on!
Recipe 1: Rice and Coconut Milk
Get ready to take your hair on an exotic journey with this tropical mix! You’ll need 4 tablespoons of cooked rice, mashed to a smooth paste, one tablespoon of coconut milk, one egg white, and one tablespoon of olive oil. Mix these ingredients well and apply the concoction to your hair from the roots to the end. Let your hair soak up the goodness for at least an hour before washing it off with normal water and a mild shampoo and conditioner. Repeat once a week for best results.
Recipe 2: Honey and Curd Hair Mask
Who says yogurt is just for breakfast? Slather some onto your locks and watch the magic happen! Combine 2 tablespoons of yogurt and 1 tablespoon of honey into a creamy paste. Apply this mixture to your hair, focusing on the damaged areas. Cover your hair with a shower cap. Please sit back, relax, and let the mask do its thing for about 30 minutes. Rinse with cool water (trust us, you don’t want a hot mess) and style as usual.
Recipe 3: Homemade Hair Pack with Bananas and Avocado
Oh, you fancy, huh? Make your fruit fix by mashing one ripe banana and avocado into a silky hair pack. Amp the moisturizing benefits with a tablespoon of honey and almond oil, creating a smoothie your hair won’t forget. Apply this mixture evenly on your hair, dreaming of tropical islands as you do so. Massage it into your scalp, working it down to the tips. Let it sit for 30 minutes, then rinse it with mild shampoo and water.
Voila! There you have it, ladies and gents – three fabulous, fruitilicious, all-natural keratin treatments you can do in your home! Did you ever imagine getting salon-worthy, silky smooth hair could be easy and fun? Remember that Rome wasn’t built in a day, nor will your hair transform in one session. Give it time, follow the routine consistently, and soon, your hair will be as smooth as a baby’s bottom (okay, maybe not that smooth, but you get the gist). Happy hair experimenting!
Step 3: Applying the Keratin Treatment
It’s time to dunk your locks in love, or what we fondly call a DIY Keratin treatment. So let’s buckle those beauty seat belts and dive head-first into Step 3, shall we?
First things first, learn to section your hair, people! It’s not all willy-nilly, okay? There’s an art form to this, a science, an oratory. Part your hair into multiple sections so every strand gets a fair shake at the Keratin Olympics. And no, it is not a valid excuse to turn into Medusa! Master the technique of hair sectioning, and you’ll be on your way to achieving salon-quality results.
We’re at the heart of it – the correct way of applying the treatment. Start by donning your favorite pair of gloves; they don’t need to match your outfit, but who am I to kill your style statement? Massage the Keratin blend from your scalp to the tips of your hair, just as you would with your favorite chocolate shampoo. Yes, chocolate. Don’t judge me here; we all have our quirks!
This brings us to the F.R.I.E.N.D.S marathon episode of our process, ‘The One Where You Wait.’ And no, this does not give you a free pass to binge-watch! You want to let the magic potion sit for 30 minutes to ensure the goodness of Keratin sinks into every hair fiber. It’s like waiting for your pizza delivery – annoying but oh so worth it!
And that, my dear hair warriors, concludes the Keratin quest of Step 3. Your hair thanks you, and Ross & Rachel are on a break, just in case you needed an update. Back to you in the shampoo bottle, folks!
Step 4: Washing and Drying
Step 4: Washing and Drying
Ah, the moment of truth, rinsing off the magical goo from your head. Now that your hair has been smothered with love, it’s time for an excellent rinse. Carefully wash away the treatment with cool water (you don’t want to awaken the frizz monster), and make sure no residue is left behind.
Now, pat yourself on the back (or head) because you’re about to reach the finale of this hair escapade. Grab your trusty blow-dryer and brush, and channel your inner hair, goddess. Show your man who’s boss as you blow-dry your hair, focusing on the most damaged areas. Pro tip: Keep the heat to a minimum because, let’s face it, your hair has been through enough today.
And voila! Your silky, smooth hair is now ready for the world to envy. But wait, there’s more. When styling your post-treatment masterpiece, opt for gentle, heat-free options. You just went through a DIY spa day – don’t ruin it with curling irons and straighteners! Embrace your newfound smooth hair and keep it frizz-free with a light serum or leave-in conditioner.
In summary, the key to unlocking silky, smooth hair is just a rinse and dry away, and we dare say you’re now quite the mane maestro. So, go forth and reveal your excellent results to the world – you’ve earned it! Remember, with great power comes great responsibility – or, in this case, great hair comes excellent hair care.
Maintaining Your Silky Smooth Hair
Maintaining Your Silky Smooth Hair
Now that you’ve pampered your hair with the DIY keratin treatment, the question arises: how often should you repeat it? Well, fear not, sassy-haired goddess, for this miraculous treatment can be done every 4 to 6 weeks, depending on your hair’s Keratin-retaining capabilities.
Don’t just sit back and relax! Ensure you adopt additional hair care practices, such as keeping it clean (duh!), using a wide-tooth comb, avoiding excessive heat, and treating those luscious locks to regular trims. Also, watch for any signs of damage, like split ends or excessive breakage, just in case a battle plan is required.
And there you have it! Bask in the glory of your ultra-smooth, swoon-worthy hair. You’ve earned it.
Conclusion
And there you have it, folks – the secret to unlocking silky, smooth hair without breaking a sweat or the bank! You’ll be strutting through life with a hair flip that could rival shampoo commercials in no time. Say goodbye to your hair woes and wave hello to that fabulous hair transformation because DIY keratin treatments are here to stay. Let the skeptics doubt, while you flaunt your head-turning tresses. The undeniable game-changer of hair care is just a few (or several) kitchen ingredients away. So embrace your luscious new locks – you deserve it, darling.